
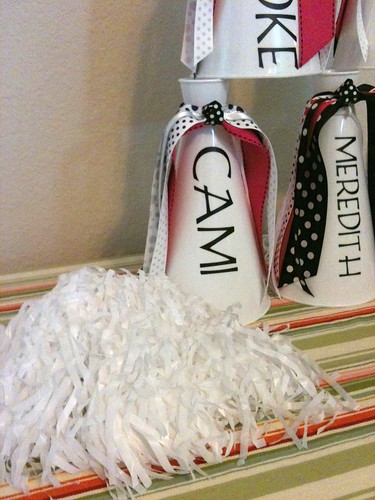
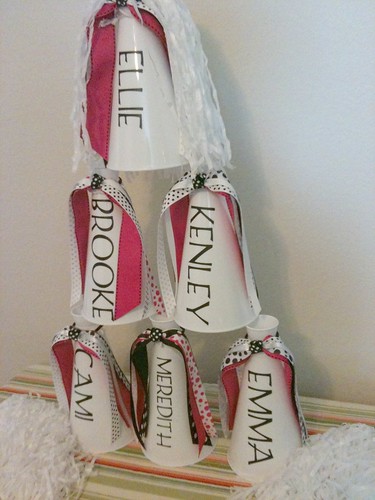
Her older daughter was having a cheerleading party and my neighbor had gotten some megaphones from US Toy for $1.95 each and did vinyl letters on the side for each girls name - TOTALLY ADORABLE (picture later after tutorial). She also gave them two little pom poms that she got there too as shown in the pictures at the bottom.
So she had found a tutorial on Girly Things Bows that was ok, but not really a good quality photo tut. So with that tutorial I began working on making a better tutorial that is more explanitory. My photos still aren't wonderful color quality since they were taken with my phone, but they definatly are better at explaining the HOW TO.
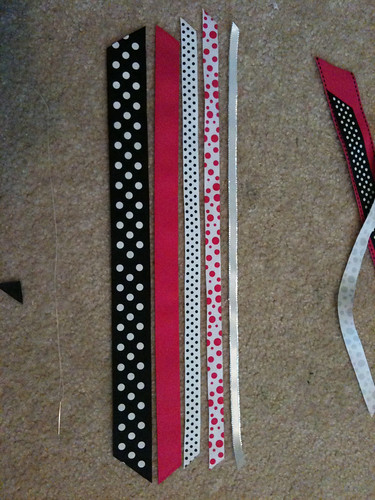
First thing, gather the ribbon that you would like to use. I did a total of 5 ribbons. One really big one one a little thinner, two smaller than that and one really thin one. Then I cut them to be about 15 inches long. Depending on your kiddos hair you can edit the size. Then don't forget to fray check the ends so that they don't ravel.
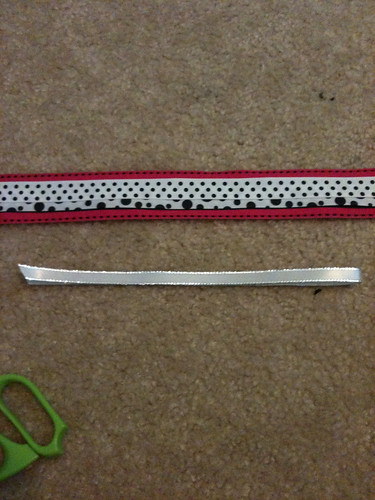
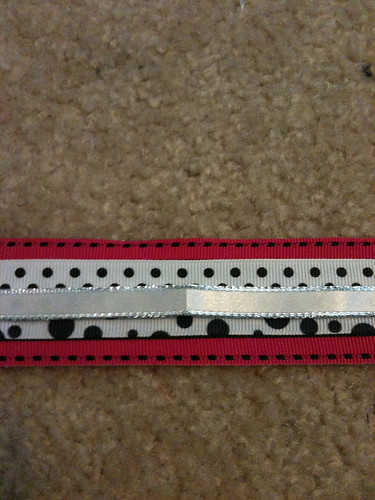
Next stack your ribbons in the order you want them. The smallest ribbon you will need to fold in half to have a creace to show you where to stitch.
See the crease:
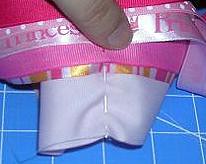
Next you will need to take a needle and thread and stitch through your ribbon with it stacked how you want it. Don't spread them out, it won't turn out right. I forgot to take a picture of this part so I borrowed this picture from the other site. Although it isn't quite what I did, you get the kind of stitch I did just make sure you hit all the layers.
Now pull the thread tight and tie it a couple times:
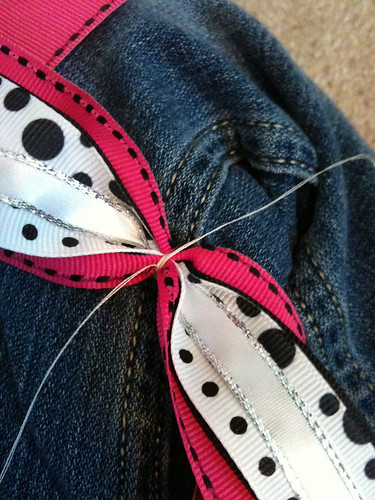
Before we go any further now is a good time to take the hot glue gun and at the very center go in each layer and make a small dot on each side of the thread to keep the ribbon from sliding in the event that the threads break. Easy and made me feel better since they were gifts that they were more sturdy.
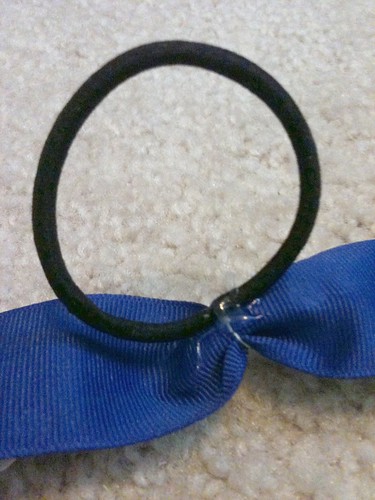
Next you will take your pony tail holder and hot glue it on the ribbon stack (wrong side of ribbon) and have the pony tail holder sticking straight up. This one is the one I did for Laci (hence the change in ribbon color from pink).
This is the hardest part. Not really, but until you get the idea of how it goes, it is. It took me like 10 minutes for this for the first one, then I was slammin them out. Ok, so what you do is you start by making a knot in the ribbon, but don't pull it tight. Now the trick here is to flip the ribbon so that the pattern is right side up on both sides. Once you do this the point stays put and you are ready to wrap it around your bow/ponytail holder. BTW it was about 6 inches long.

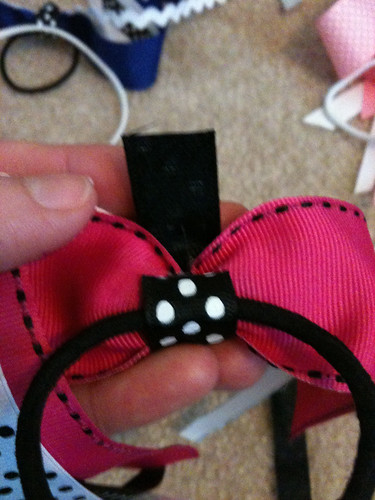
After you master that last step then you will hot glue the point to hide the top mess of thread. This is a side picture which wasn't the best choice but you get what I mean.

Now wrap around the bottom, keep in mind that you may need to cut it shorter than you originally had the piece so that the end doesn't go quite up to the point.
Next, put them on the top of your cute little megaphone lip and take some pictures because these little suckers are ADORABLE!!! I am so glad my neighbor asked me to help because this was an awesome little party favor that takes more time than it did money. But when doing it with someone else it was so much fun!
Now go enjoy making your own little hair bows and putting names on some cute little megaphones!
TTFN~
Cute!
ReplyDeleteThank you - this is very helpful!! :)
ReplyDeleteThank you for the help!! My daughter plays basketball and I will be making them for her team!! =-)
ReplyDeleteTeddy bear collecting is a popular and profitable hobby. The first Teddy bears were made in 1902 and some bears have become scarce and desirable collectibles. bear names
ReplyDelete