
****Don't forget to check out the GIVEAWAY from the 10/9/09 post!****
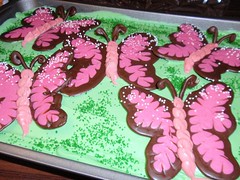
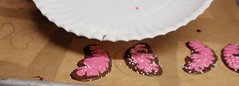
So the comments I got today were along the lines of "these are too pretty to eat". What do you think? Here is the picture of the final products & below that are pictures & tutorial on how to make the butterflies.

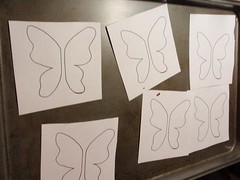
Ok, so start with the butterfly template. Draw or print one off and copy it a couple of times. May want to make the wings further apart than I did so that they don't run together, but if they do they break apart really easy after getting hard. Put Wax paper on top so that you can peel the finished butterflies easily.
Then take your melt able candy (looks like larger smashed chocolate chips, can find them at any baking store) and put one cup into a zip lock bag. Leave the bag open, and heat for 10 seconds at a time for about 60 seconds, kneading between times until no lumps are left. You can do both colors at the same time in the microwave. Squeeze the air out and seal the bags, then cut a tiny 1/16 hole in the corner.
Start tracing your template, working on (1) wing at a time (this stuff dries quick!). You may have to go around twice depending on how thick you do the edges. Then take your other color and fill in. Once filled in pick up your pan and rap it on the counter a couple of times so that the colors run together and flatten out.

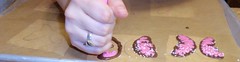
After you have flattened this out you need to take the toothpick and pull into run the outside color in. Then rap the pan on the counter again.

After that take your white pareils and sprinkle them on the top. As pictured it is easiest I found to put them on a paper plate and bop the paper plate from the bottom to pop some off until you think you have enough.
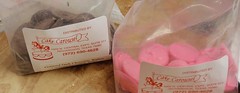
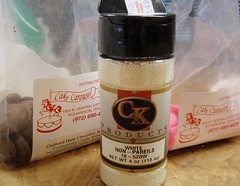
This was the stuff I used.
Once you have finished a pan of the butterflies you need to pop them in the refrigerator for a couple minutes to get them to harden even more. Don't forget to do a vertically smooshed V for the antennas with the chocolate.
After you finish all your butterflies make a cake or cupcakes, then you need to tint your icing and spread out your icing on your surface. Then if you are doing cupcakes, don't forget to rim your cupcakes with the crystal like sprinkles (adds the finished touch). Once your cupcakes are ready you need to have (4) brown MnM's (2 on each side) to pop up the wings. Take the antenna and stick it in the cake or cupcakes to pop up. Then last take a Ziploc bag with tinted icing and pipe down the middle to make the body of the butterflies.
They turned out pretty cool, and I got a good response at work when I brought them in.
If you make any let me know. I would love to see.
TTFN,
hola ..my name is alejandra i love your tutorial , i have one question what kind of icing o frosting do you use in the cupcakes > ? and the butterfly do no melt down ? thank you
ReplyDeletealex8007@live.com
Alejandra, I just used the Duncan Hines icing from the store and tinted it with gel food coloring. Also, to have the butterfly not melt when putting it on the cupcake I had just pulled them out of the fridge. Then when they were at room temp without touching them they were fine. If you mean how did I keep them propped up I used MnM's to keep them held up. Let me know if you have any other questions. Thanks for reading! Julie
ReplyDeleteTHANK YOU TI IS HELP ME A LOT , SORRY FOR MY ENGLISH I AM FROM MEXICO SO I SPEAK SPANISH ...
ReplyDeletewere did u get the template from
ReplyDeletewith the body is that chocolate too or frosting and what kind of template did u use? also this is such a preety idea and i want to make this for my mom birthday
ReplyDelete